This post probably contains affiliate links. This means that you still pay the same price, but we earn a small commission. As an Amazon Associate, we earn from qualifying purchases. We only ever link products that we have tried and can recommend with confidence. These items are Nirvana Girl approved! We always appreciate your support in our journey!
I love plants. I keep buying plants and spend too much money on plants! Just can’t bring myself to spend money on pots for plants, therefore I make my own DIY concrete pots. I will admit to being a novice at this, experimenting a bit, and using trial and error to learn. However, some of my projects have turned out pretty damn cool!
Safety:
Let’s start with safety. When making DIY concrete pots, wear safety glasses, a mask, and gloves, as the super fine dust can be harmful. Ideally do this outside or in a garage. I have done it in the house, but it’s messy and a bit stressful, so the garage is now filled with pot making supplies and I can’t park in my parking spot.
Supplies:
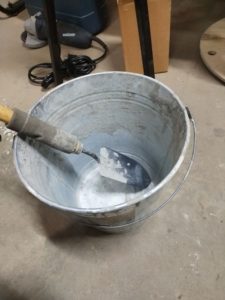
Secondly, you will need some supplies. I use a medium sized metal bucket for mixing, a cheap garden trowel (also metal), a dollar store measuring cup for water, and cooking spray. The reason for the metal bucket is because I use a cement mixture with some gravel in it, also it’s easier to rinse out later. (Don’t clean up your concrete making supplies in the house, it will be bad for your plumbing!) Everything gets covered in concrete eventually, so buy cheap stuff. The cooking spray is for the molds. I spray the inside of the outer mold, and the outside of the inner mold so that any part that is touching the concrete is coated. This is going to make getting the molds apart way easier once everything is dry.
The Process:
Now for the process. First figure out the size of the pot you want, then add a couple inches all around. I regularly make my pots just a hint too short, and then you can see the top of the nursery pot over the edge. I’m not picky enough to start over, but it’s a bit aggravating.
Next we find molds. I’m a cheap minimalist who hates buying stuff that’s just going to get thrown out, so I use objects from around the house. (Old plant pots, empty containers, and tupperware missing lids.) Get creative! Find some unique shapes and ideas to play with! I find that plastic works much better than metal when it comes to getting the molds off the pot. Some plastic is going to be easier than others, I find the thinner, more flexible it is the better. Also milk cartons, yogurt containers, and other recyclables work well.
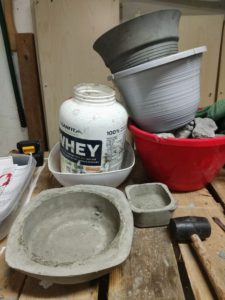
Next you pair them up, so that your larger outer mold matches the size of pot you want, and your smaller inner mold matches the size of plant you are housing. Like I said earlier, give yourself a couple extra inches at least. Keep in mind that you want your walls a bit thick so that the pot doesn’t crack. The bigger the pot the thicker the walls should be. I try and aim for an inch minimum on smaller pots. Then spray both with the cooking spray.
Mixing:
Next we mix the concrete. I use two types, aggregate (the one with the gravel), and portland (ultra fine and smooth). Depending on the size of the pot I adjust the mixture. For a small, thin pot I use more portland, less aggregate, to make a thinner, easier to pour mixture. I also add more water so that I can literally pour it into the mold. For a bigger, thicker pot, I add more aggregate, less portland to give it more substance and structure. Also I use a bit less water as it takes less time to dry this way.
The water ratio is a bit like baking, start with less and work your way up. I start with a small amount of water in the bucket, then add the cement as it’s less dusty this way and easier to mix. Then add the cement, and continue alternating until you have the amount and consistency you want. For a small thin pot, you want a runny mixture akin to a milkshake. For a bigger thicker pot, you want it similar to a brownie batter. Make sure the mixture is very well mixed with no lumps of dry concrete.
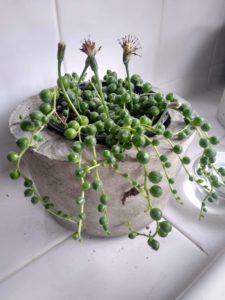
Next pour it into the outer mold. Once you have enough cement in the mold squish your inner mold down. The concrete will come up the sides of your inner mold. Check that you have the height you want and add more to top up if needed. Now you have to weigh it down so that it doesn’t float up. I use rocks or water depending on whether or not my mold is something that has a lid. Make sure it is well weighed down, otherwise your inner mold will float up causing a short pot with a thick base. Then you have to tap the sides to release any air bubbles. These bubbles can create weak spots in the pot so this is an important step! I usually do all around the sides, 2-3 times, then recenter the molds, making sure everything is straight.
Waiting:
Now we wait. For sure 24 hours, but if the pot is bigger, or if you used more water in your mix, it might need to wait 48 hours. Then comes the frustrating bit. You have to get the molds apart. Some pop right off, others require a screwdriver to pry and an extra set of hands to help you pull them apart. Check and see if it looks totally dry or not. It might need a bit of time out of the mold to finish drying. Then arrange your plant in it’s new home!
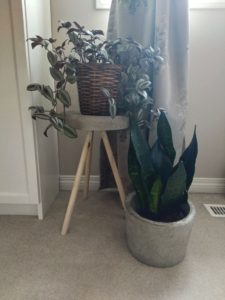
Good luck making your DIY concrete pots! Check back as I add more DIY projects such as the cute little concrete plant stand pictured above! For another great DIY project idea, check out this link to our concrete cinder block garden.